![]()
Do you want to develop Nuxeo Platform with you favorite IDE IntelliJ? Today, I’d like to share with you the IntelliJ configuration for Nuxeo. After reading this blog, you’ll understand how to:
- Download and Install IntelliJ
- Getting the Nuxeo Source Code
- Import Nuxeo Source Code into IntelliJ
- Configure Nuxeo Code Style
Prerequisite
Before getting started, you need to ensure your computer has installed the following software:
- Git
- Java 8
- Maven 3
- Python 2.7
Download and Install IntelliJ
You can download the latest version of IntelliJ IDEA from Jet Brains, the official website. It supports all the platforms including Mac OS, Windows, and Linux. IntelliJ has two editions: Community Edition and Ultimate Edition. Nuxeo sources code work with both of them. Once downloaded, install IntelliJ IDEA with your own preferences.
Getting the Nuxeo Source Code
The next step is to get the Nuxeo source code. We need to clone manually the
Nuxeo principal repository and all the other repositories using Python script
clone.py.
git clone git@github.com:nuxeo/nuxeo.git
cd nuxeo
python2 clone.py master -a
Import Nuxeo Source Code into IntelliJ
Before importing Nuxeo source code, you need to configure the VM options for
importer to increase the importation capacity. Open IntelliJ, a welcome menu
will be shown. On the right bottom of menu, click Configure > Preferences.
Then search VM options for importer and set it to:
-Xms1g -Xmx4g

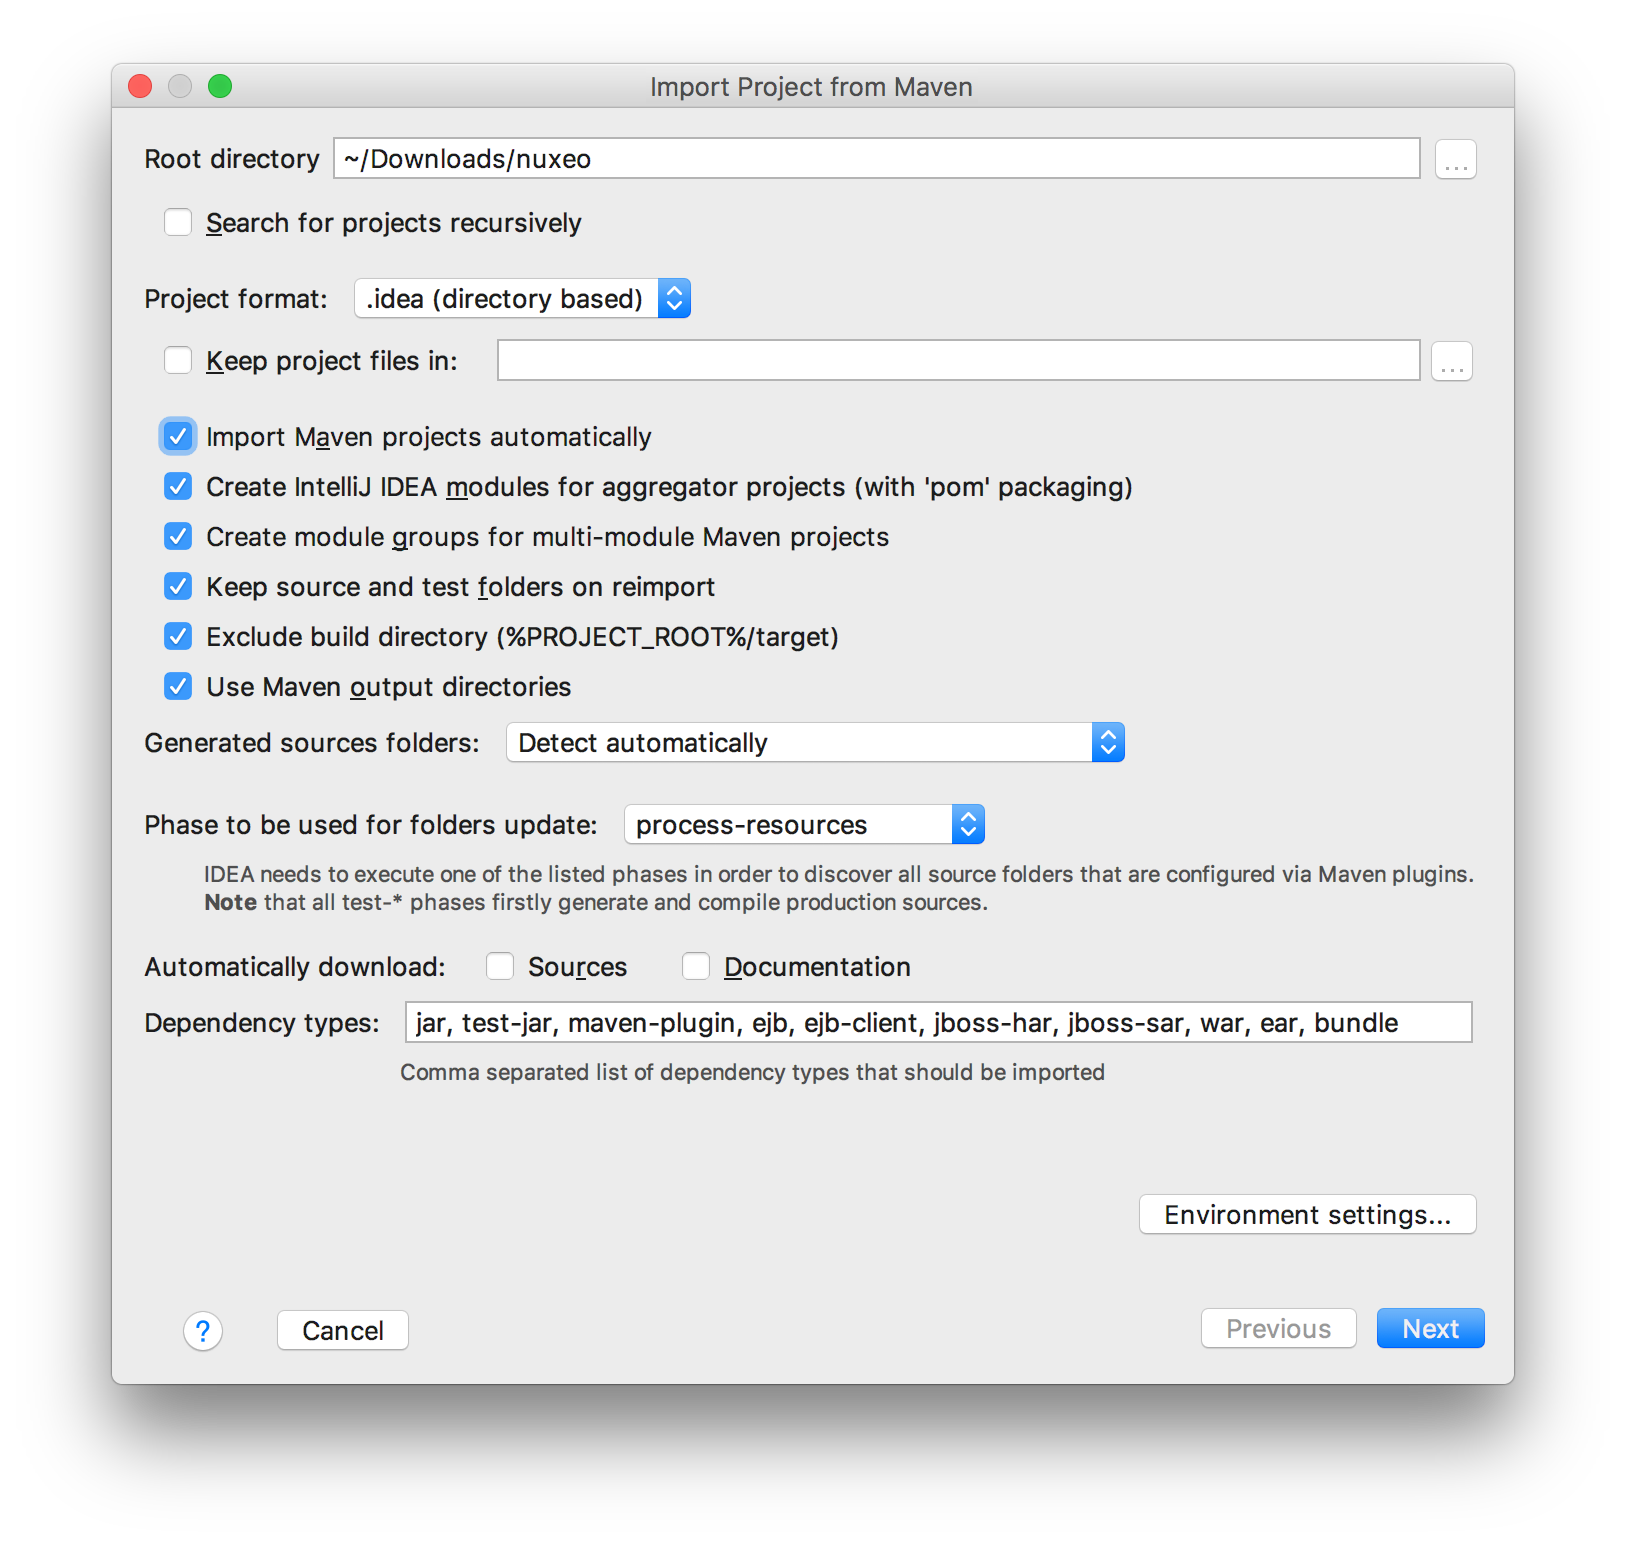
Now import Nuxeo source code as Maven project. In the default welcome menu,
choose Import Project, then find the Nuxeo root folder and select the POM file
in $NX_HOME/pom.xml. Afterwards, set up the Maven import options as the
following screenshot:
Later, you will need to:
- Choose Maven profiles: default
- Choose Project SDK: use JDK 8
- Edit name to create a new IntelliJ project: default
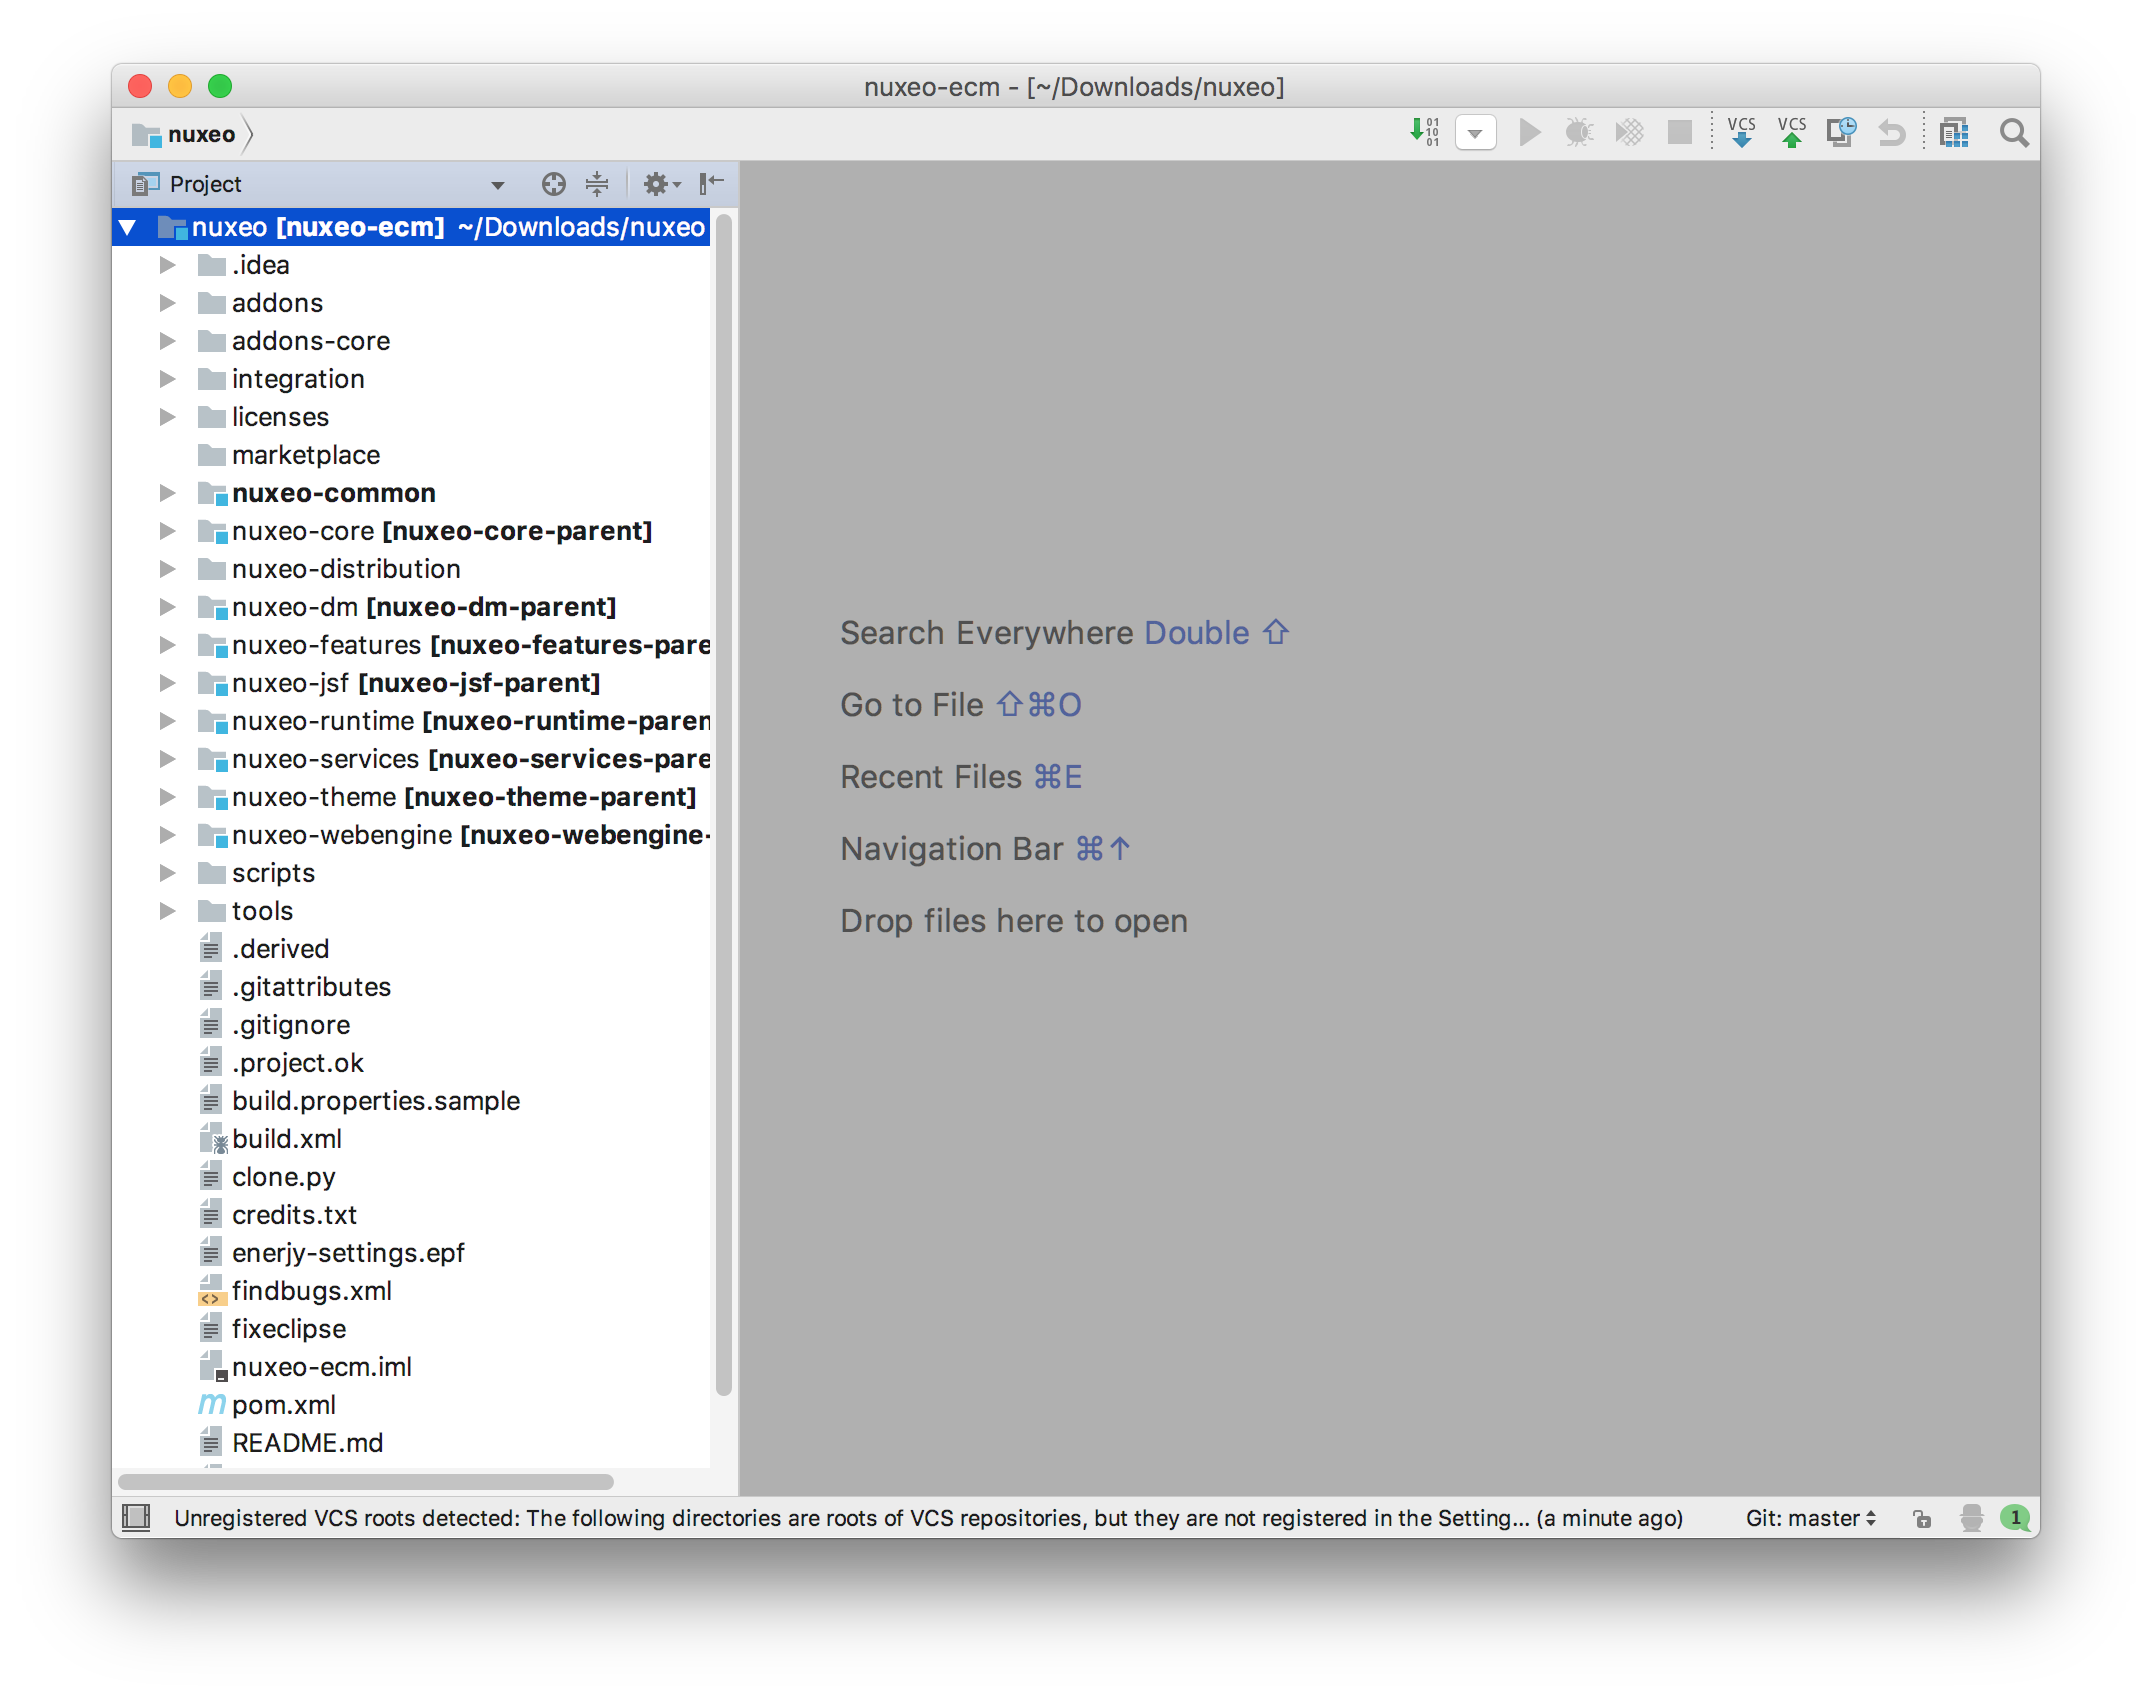
After that, the configuration is finished. IntelliJ will create a project for you, the entire process (Maven import) will take a few minutes, please be patient. Here’s the final view:
This part is optional. If you wish to work with add-ons, you need to integrate
them as Maven modules: in the project view, expand the addons folder, right
click its pom.xml, click “Add as Maven Project”.
This part is optional. If you want to improve the performance of IntelliJ, you can customize the VM options. Click Help > Edit Custom VM Options…. If there’s no existing configuration file, IntelliJ will help you to create one. Then edit the content with your preferred values:
# custom IntelliJ IDEA VM options

-Xms1g
-Xmx4g
...
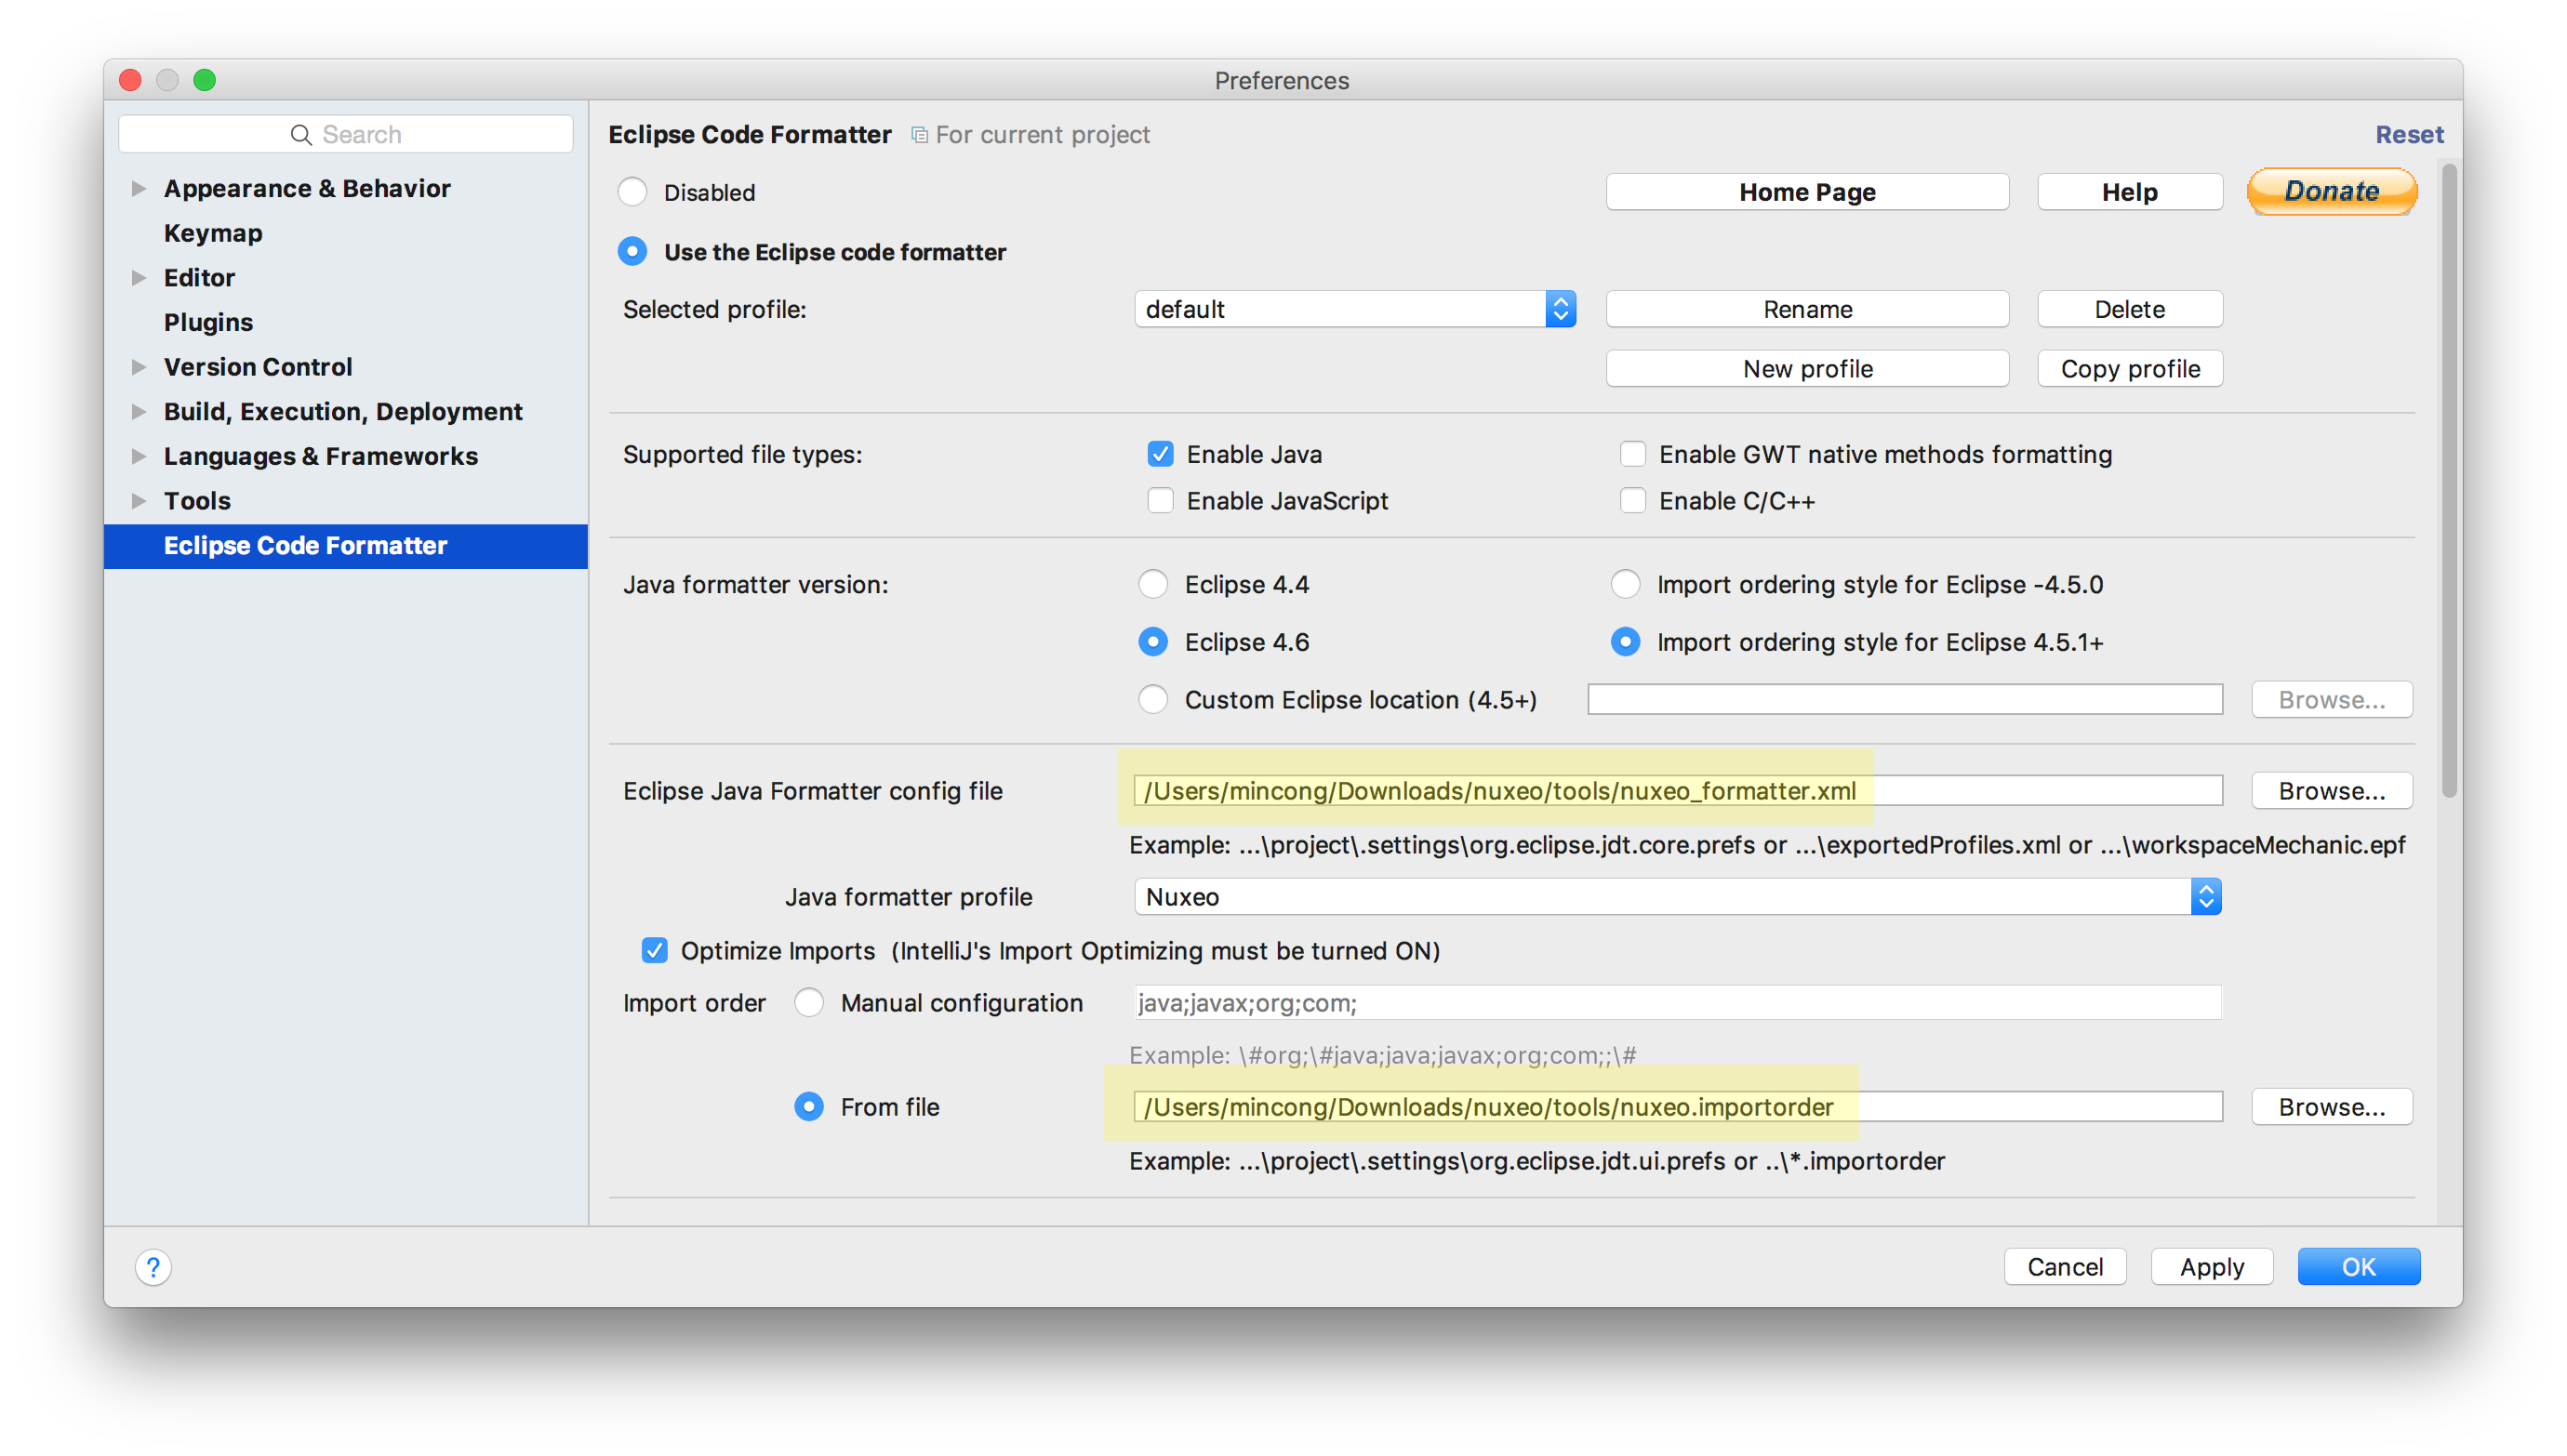
Configure Nuxeo Code Style
Download and install plugin Eclipse Code Formatter. Import the tools provided
by Nuxeo as shown below. Tools are located in path $NX_HOME/tools.
Congratulations! Now everything is done. Enjoy IntelliJ IDEA, your capable and ergonomic IDE!