Overview
Polymer CLI is an all-in-one command-line interface that covers the vast majority of Polymer development tasks, including unit testing. The underlying library that powers Polymer CLI’s unit testing tools is called Web Component Tester (WCT).
Web Component Tester is an end-to-end testing environment built by the Polymer team. It enables you to test your elements locally, against all of your installed browsers, or remotely, via Sauce Labs. It is built on top of popular third-party tools, including:
- Mocha for a test framework, complete with support for BDD and TDD.
- Chai for more assertion types that can be used with your Mocha tests.
- Sinon for spies, stubs, and mocks.
- Selenium for running tests against multiple browsers.
- Accessibility Developer Tools for accessibility audits.
In this article, I’ll principally focus on test setup, to ensure WCT actually works in your machine. I’ll also provide some demos for assertions. After reading this article, you will understand:
- Tests generation via
polymer-init - Launch tests locally
- Browser detection
- Launch tests on Travis CI
- Launch tests on Jenkins CI
- Understand the test structure
- Write your own tests
- Why using Web Component Tester (WCT)?
As usual, you can see the source code on GitHub: mincong-h/polymer-wct-demo.
Tests Generation via polymer-init
When initializing your Polymer element using command polymer-init, a test
file is automatically generated by Polymer CLI. The name of the test file starts
with the name of your element, followed by _test.html. It is located in the
test folder of your project. For example, if the element’s name is
polymer-wct-demo, the generated test file is
test/polymer-wct-demo_test.html.
Launch Tests Locally
Once generated, you can install all dependencies and then launch the tests
locally using command polymer test at the project root directory. WCT detects
all the browsers that you have locally installed, and run tests on them. For
example, in my machine, I’ve 3 browsers installed: Chrome, Firefox, and Safari.
WCT runs on all of them.

As you can see, WCT uses Selenium server for local browsers behind the screen. If you have troubles with Safari, you should see Polymer 2’s documentation: Set up testing on Safari.
Browser Detection
When running WCT locally, WCT uses launchpad to looks up all installed
browsers. The following browser names are recognized: chrome, firefox,
safari, ie, edge, opera, canary, aurora, electron, phantom,
nodeWebKit. Not all platforms support all browsers - see platform for
details.
Launch Tests on Travis CI
Launching tests on Travis requires installation of browsers and the source code. In my case, I want to test against Firefox and Chrome. So I need to install them as add-ons, see Travis Firefox and Travis Chrome. Then install Polymer CLI and Bower in a global scope and let Bower to install the dependencies.
In order to run tests using a browser that’s loaded on the CI Server, you will need to configure your tests to launch the browser virtually (e.g., using something like Xvfb). Xvfb (short for X virtual framebuffer) is an in-memory display server for UNIX-like operating system (e.g., Linux). It enables you to run graphical applications without a display (e.g., browser tests on a CI server) while also having the ability to take screenshots.
language: node_js
dist: trusty
addons:
  firefox: 58.0
  chrome: stable
node_js:
  - 6
  - 7
  - 8
  - 9
before_script:
  - npm install -g polymer-cli@1.6.0
  - npm install -g bower@1.8.4
  - bower install
script:
  - xvfb-run polymer test --verbose
Launch Tests on Jenkins CI
In my daily work at Nuxeo, we use Jenkins to launch tests. The principal is very similar to Travis CI. The only difference is that browsers are not considered as addons. You cannot choose the browsers yourself in a traditional Jenkins job. They are hard-coded in the docker image. However, WCT can still find the installed browsers in the machine.
Actually, Launchpad can lookup browsers via environment variables. So maybe it can be the solution for solving the browser problems on Jenkins. These variables are:
LAUNCHPAD_BROWSERS- comma delimited list of browsers you want to use, e.g.LAUNCHPAD_BROWSERS=chrome,firefox,opera. Other browsers will not be detected even if they are installed.LAUNCHPAD_<browser>- specifies where given browser is installed so that Launchpad does not need to look for it, e.g.LAUNCHPAD_CHROME=/usr/bin/chromium
See Launchpad: Environment variables impacting local browsers detection.
Understand the Test Structure
A typical test file generated by Polymer CLI looks like this:
<!doctype html>
<html lang="en">
  <head>
    <!-- 1. Import the JS / HTML files for tests --->
    <script src="../../webcomponentsjs/webcomponents-loader.js"></script>
    <script src="../../web-component-tester/browser.js"></script>
    <link rel="import" href="../polymer-wct-demo.html">
  </head>
  <body>

    <!-- 2. Define your element inside the fixture -->
    <test-fixture id="BasicTestFixture">
      <template>
        <polymer-wct-demo></polymer-wct-demo>
      </template>
    </test-fixture>

    <!-- 3. Write tests -->
    <script>
      suite('polymer-wct-demo', () => {
        test('instantiating the element with default properties works', () => {
          const element = fixture('BasicTestFixture');
          assert.equal(element.prop1, 'polymer-wct-demo');
          const elementShadowRoot = element.shadowRoot;
          const elementHeader = elementShadowRoot.querySelector('h2');
          assert.equal(elementHeader.innerHTML, 'Hello polymer-wct-demo!');
        });
      });
    </script>
  </body>
</html>
It contains 3 important parts of information: the JS / HTML files to import; the element to test, defined inside the text fixture; and the actual test logic. Test fixtures enable you to define a template of content and copy a clean, new instance of that content into each test suite. Now let’s take a deeper look inside the test method.
test('instantiating the element with default properties works', () => {
  const element = fixture('BasicTestFixture');
  assert.equal(element.prop1, 'polymer-wct-demo');
  const elementShadowRoot = element.shadowRoot;
  const elementHeader = elementShadowRoot.querySelector('h2');
  assert.equal(elementHeader.innerHTML, 'Hello polymer-wct-demo!');
});
This is a typical TDD structure in Mochai JS. The TDD interface provides suite(), test(), suiteSetup(), suiteTeardown(), setup(), and teardown(). Other interfaces, like BDD is also possible, but we won’t discuss more here.
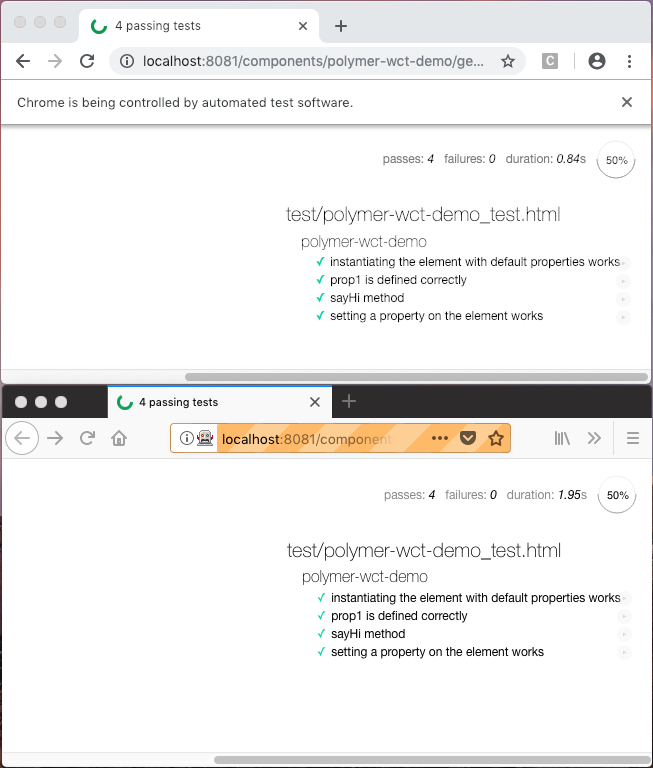
Now, the tests can be run as polymer test. You can also use option -p to keep
the browsers open after the tests. Using polymer test -p, you can see the
results as the screenshots below:
Write Your Own Tests
You can assert different things in Web Component Tester. Here’re some examples.
Assert property. Assert the availability and the value of a property.
test('prop1 is defined correctly', () => {
  const element = fixture('BasicTestFixture');
  assert.equal(element.prop1, 'polymer-wct-demo');
});
Assert method. Assert a function defined in the element class.
test('sayHi method', () => {
  const element = fixture('BasicTestFixture');
  assert.equal(element.sayHi('world'), 'Hello, world');
});
Assert shadow DOM. Assert any HTML element inside the shadow DOM. The root
of the shadow DOM is accessible via host property shadowRoot.
test('setting a property on the element works', () => {
  const element = fixture('ChangedPropertyTestFixture');
  assert.equal(element.prop1, 'new-prop1');
  const elementShadowRoot = element.shadowRoot;
  const elementHeader = elementShadowRoot.querySelector('h2');
  assert.equal(elementHeader.innerHTML, 'Hello new-prop1!');
});
For more use cases, you can find out on Polymer documentation: Test your elements - Creating tests.
Why using WCT?
The primary interests of using WCT are:
- Unit testing elements
- Fast to execute
- Support all browsers
- Assertion capabilities
Conclusion
In this article, we did a quick look about what is Web Component Tester (WCT), how to launch tests, its browser detection mechanism, setting up CI, understand the test structure and the advantages of using WCT. The source code of the demo is available on GitHub as mincong-h/polymer-wct-demo. Hope you enjoy this article, see you the next time!